

Introduction
Let’s continue, with this second part, the creation of the Linux cluster by automating the whole procedure of the previous article using Vagrant so that we also have some more freedom on managing the cluster.
For simplicity of presentation, we consider that Vagrant is already installed on the same computer where Virtualbox is.
Vagrantfile
Working directory
Let’s start by creating the Vagrant project folder then let’s go inside:
mkdir linux-cluster-test
cd linux-cluster-test
Creating secure passwords for the cluster with vagrant
To create the Vagrantfile file you normally use the “vagrant init” command which creates the default one, however in this case it is easier to start from an empty file. To do this we open our favorite editor (I usually use “vim“) on the empty Vagrantfile file and add the following lines to the file:
# random_password method: return a 12 (or length) random characters for user password
$CHARS = ('0'..'9').to_a + ('A'..'Z').to_a + ('a'..'z').to_a + ('#'..'&').to_a + (':'..'?').to_a
def random_password(length=12)
p=''
(0..length).each do
p+=$CHARS[rand($CHARS.size)]
end
return p
end
$hacluster_pwd=random_password
$fencecluster_pwd=random_password

## ... Insert the mail part ... ##
The “random_password” function in Ruby generates a 12-character random password and returns it at the output so that in the “$hacluster_pwd” variable and in “$fencecluster_pwd” we have 2 separate random and robust passwords to be used for the hacluster user and for the fence user respectively.
Main part
We complete the Vagrantfile with its main part by adding the following lines:
Vagrant.configure("2") do |config|
  [2, 3, 1].each do |i|
    config.vm.define "cl-c7-node-#{i}" do |node|
      node.vm.box = "generic/centos7"
      ## ... enter the part for the cluster network here ... ##
      node.vm.hostname = "cluster-cl-c7-node-#{i}"
      node.vm.synced_folder ".", "/vagrant", disabled: true
      node.vm.provider "virtualbox" do |vb, override|
        vb.name = "cl-c7-node-#{i}"
        vb.memory = "1024"
        vb.customize ["modifyvm", :id, "--groups", "/cluster/centos7"]
      end
      ## ... enter the part for provisioning here ... ##
    end
  end
end
In this way we have the minimum configuration for the 3 vm which will be initialized in sequence starting from 2 then 3 and finally 1.
In particular, we disable the shared /vagrant folder that Vagrant enables by default since it is not needed for our tests, we assign 1GB of ram for each vm and finally with vb.customize we put the 3 vm under the “centos7” group inside “cluster” in Virtualbox.
We just have to add the configuration part of the network and the last one relating to provisioning, that is, to the internal configuration of the VM as operating system.
Network configuration for the cluster
Let’s configure the vm with 3 networks: the first automatic NAT that Vagrant does automatically for its internal operation, the second for the cluster network (with 192.168.33.0/24 network) as a private network and finally the third as a fence network ( with 192.168.43.0/24 network) always as a private network.
    # Cluster private net for Carousync
    node.vm.network "private_network", ip: "192.168.33.#{i + 10}", auto_config: false
    # private net for fencing (pcs stonith)
    node.vm.network "private_network", ip: "192.168.43.#{i + 10}", auto_config: false
Provisioning
This is divided into 2 parts, the first which launches the “10-node_configuration.sh” script valid for all 3 nodes of the cluster and which will then do all the configuration and installation relating to the node and the software necessary for the cluster that is, all that we have already seen in the previous article up to the paragraph “Cluster and agents configuration“.
Finally, the second part will be performed only by the first node, which is the last in sequence to be initialized by Vagrant, through the “90-single-cluster_configuration.sh” script in order to take care of creating the cluster by authorizing the 3 nodes , then to create the resources and the resource groups and finally to create those of the fence.
   node.vm.provision "Update software and configure node",
      type: "shell",
      path: "provision_scripts/10-node_configuration.sh",
      args: "'#{$hacluster_pwd}' '#{$fencecluster_pwd}'"
    if i == 1
      node.vm.provision "Configuring Cluster via pcs on all nodes",
      type: "shell",
      path: "provision_scripts/90-single-cluster_configuration.sh",
      args: "'#{$hacluster_pwd}' '#{$fencecluster_pwd}'"
    end
The complete Vagrantfile and the 2 provisioning scripts can be found on Github.
VM and cluster creation with vagrant
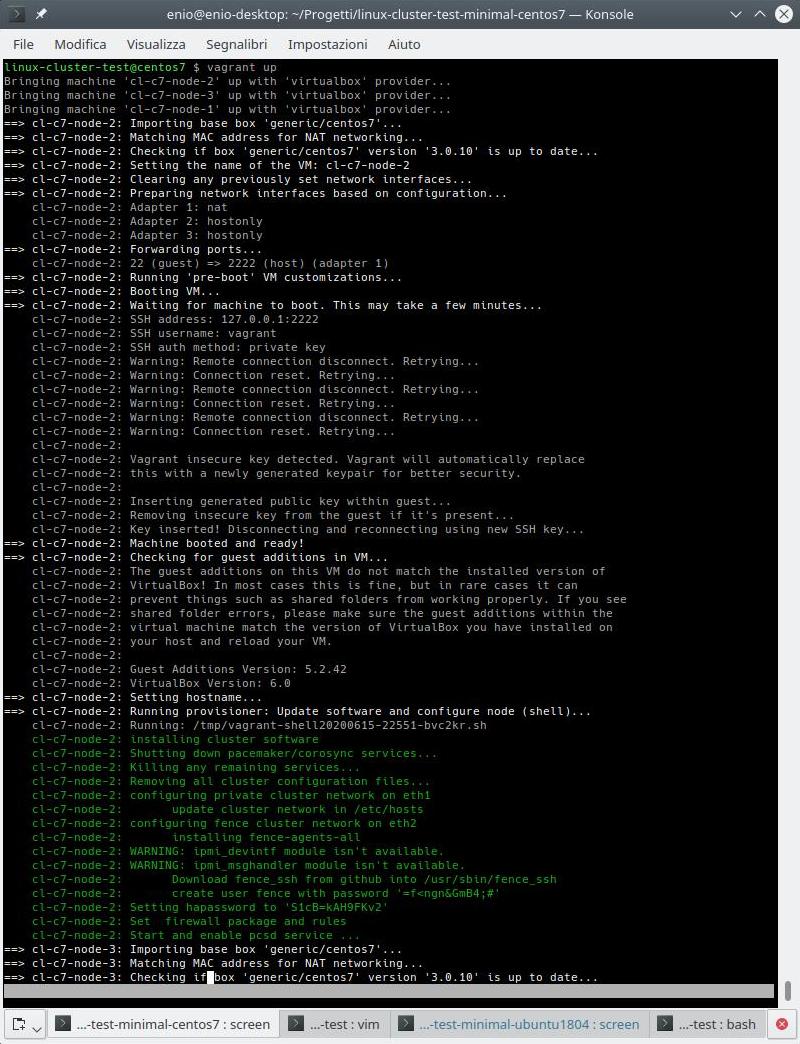
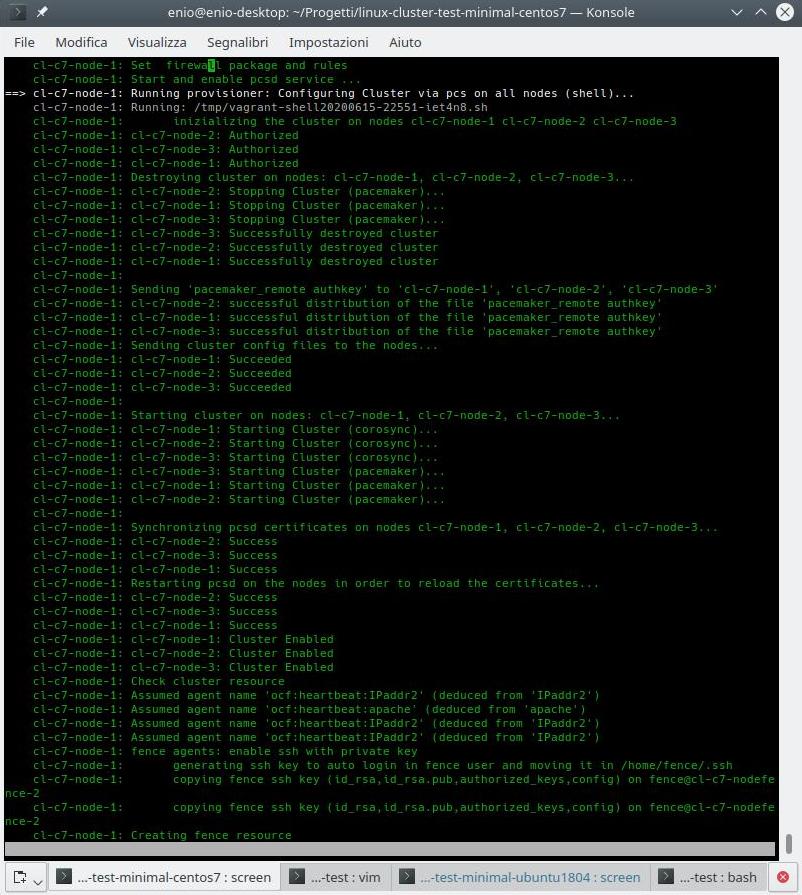
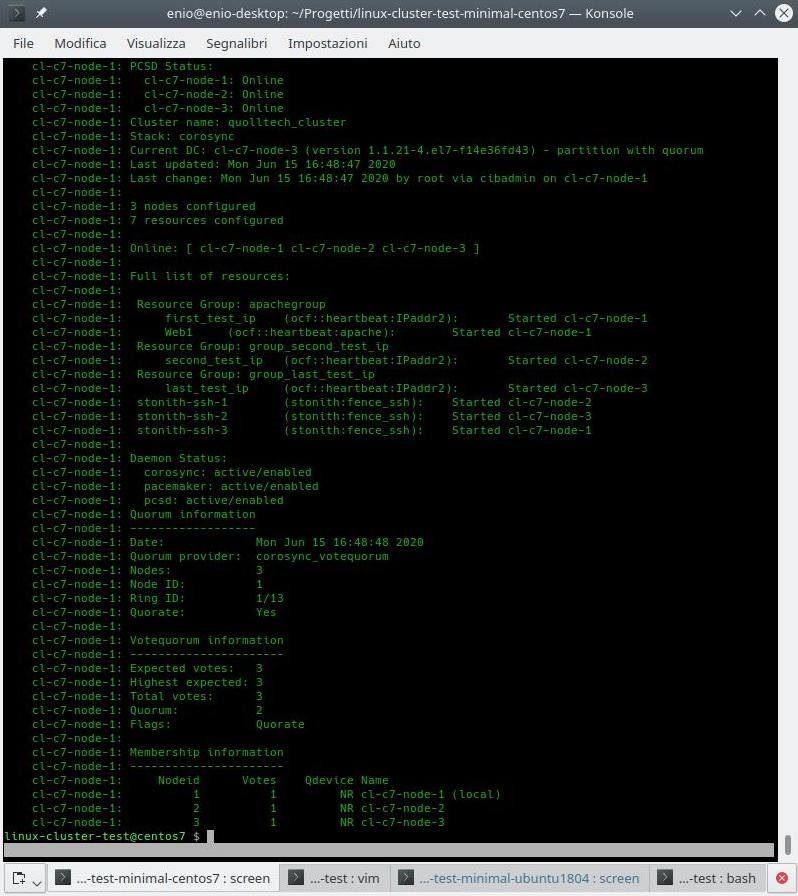
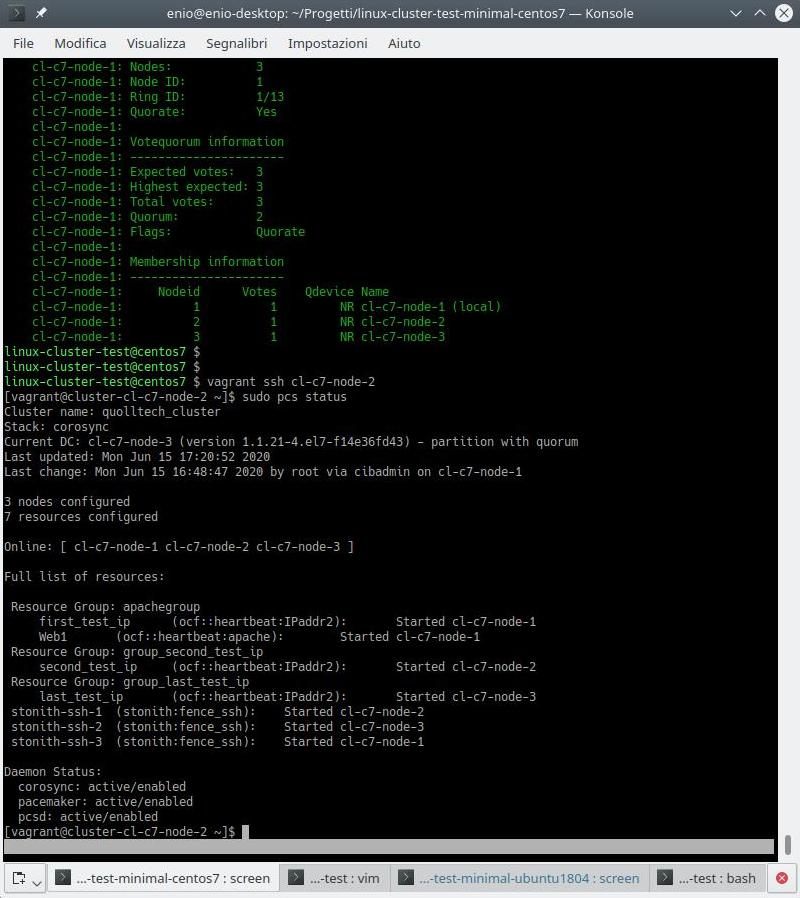
Everything is ready for the installation of the 3 vm centos 7 then via the command:
vagrant upwe launch the installation process and finally provisioning everything as can be seen from the screenshots below with the only “vagrant up” command.
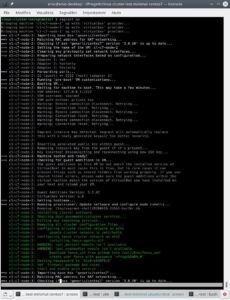
node 2 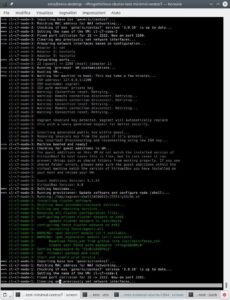
node 3 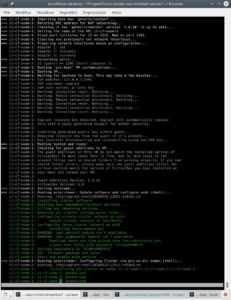
node 1 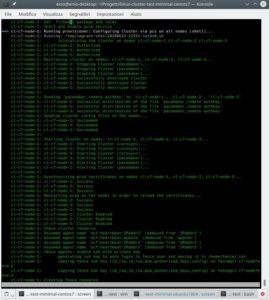
cluster installation 
cluster status 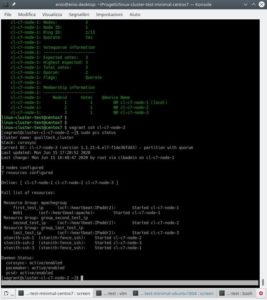
vagrant ssh on node 2


Vagrant cluster alternative with Ubuntu 18.04 LTS
If we were interested in using and testing the same environment but with Ubuntu 18.04 LTS instead of Centos 7 it would be necessary to make some changes both to the Vagrantfile file and to the 2 provisioning files.
Vagrantfile
Compared to the Vagrantfile for Centos 7 we have to modify a few lines of code:
config.vm.define “cl-c7-node-#{i}”con config.vm.define “cl-u18-node-#{i}”;node.vm.box = “generic/centos7”con node.vm.box = “ubuntu/bionic64”;node.vm.hostname = “cluster-cl-c7-node-#{i}con node.vm.hostname = “cluster-cl-u18-node-#{i}”;vb.name = “cl-c7-node-#{i}”con vb.name = “cl-u18-node-#{i}”;vb.customize [“modifyvm”, :id, “–groups”, “/cluster/centos7”] con vb.customize [“modifyvm”, :id, “–groups”, “/cluster/ubuntu1804″]
Provisioning files
The 2 provisioning files must also be modified to comply with the commands for Ubuntu 18.04 LTS, for example:
- the “yum” command must therefore be replaced with “apt“;
- the network files under /etc/sysconfig/network-scripts must be replaced with those of netplan under /etc/netplan;
- the firewall “firewalld” must therefore be replaced with “ufw“;
- the main apache config file changes from /etc/httpd/conf/httpd.conf to /etc/apache2/apache2.conf as well as the service managed by “systemd” changes from “httpd” to “apache2“
Complete vagrant cluster environment
Si può provare a completare da soli tale ambiente oppure in alternativa lo troviamo già completo su Github per Ubuntu 18.04 LTS.
You can try to complete this environment yourself or alternatively we find it already complete on Github for Ubuntu 18.04 LTS.
Vagrant cluster automation improvements
Now that we have the complete environment under Centos 7 or under Ubuntu 18.04 LTS we can think about what improvements to make to test the cases we want to check:
- add or remove nodes;
- test the behavior of only 2 nodes in a cluster without ever having a quorum;
- eliminate the fence network and resources;
- being able to choose from Vagrantfile whether to install a cluster with Centos 7 or with Ubuntu 18.04 LTS;
- being able to easily change the cluster and fence networks;
To do this we need to parameterize what interests us in the Vagrantfile and pass it as a parameter to the provisioning scripts.
All this I have already prepared in the “linux-cluster-test” project on GitHub where you can quickly download and test all the possibilities.
To download it:
git clone https://github.com/eniocarboni/linux-cluster-test.git
cd linux-cluster-test/
Once this is done, you can launch “vagrant up” in order to have a Centos7 cluster on 3 nodes or you can modify the Vagrantfile so that you can test other possibilities. In addition, you can also edit the Vagrantfile later and re-launch “vagrant up” to apply the changes.
For all the parameters see the documentation on the Github page of the project where in addition to those already described there is also the possibility of using LXD as a virtualization environment instead of Virtualbox.
References
- Previous article
- Vagrant to install, configure and manage virtual machine;
- Virtualbox to virtualize vm;
- LXD is a next generation system container manage;
- Pacemaker is an open source, hight availability resource manager suitble for both small and large cluster;
- The Corosync Cluster Engine is a Group Communication System with additional features for implementing high availability within applications;
- Fence Agent fence_ssh to test the cluster agent fence;
- Pcs is a Corosync and Pacemaker configuration tool;
- linux-cluster-test on Github;
- Ubuntu 18.04 LTS;
- Centos 7;
- RedHat;
- systemd;
- Ruby.