
Introduction
Let’s continue, with this third part, the creation of the Linux cluster by automating the whole procedure of the previous article using Vagrant and ansible as provisioner.
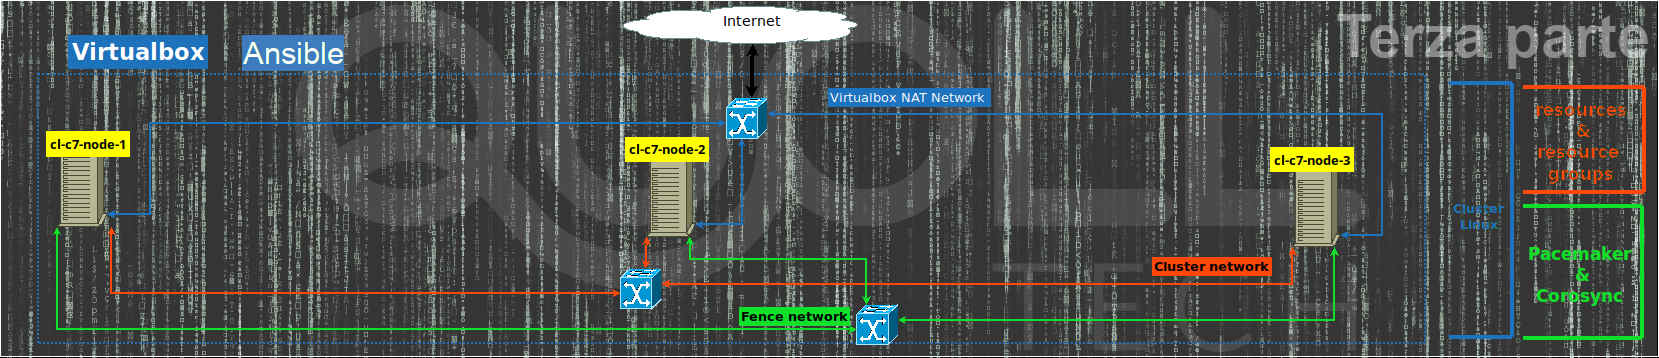
For simplicity of presentation, we consider that Vagrant and ansible (see Installation Guide) are a already installed on the same computer where Virtualbox is.
Linux cluster ansible on GitHub
On GitHub I published this project with all the specifications.
So we open a terminal and go to a work folder and download the project with:
cd $HOME
mkdir linux-cluster-test-ansible
cd linux-cluster-test-ansible
git clone https://github.com/eniocarboni/linux-cluster-test-ansible .
Let’s copy the file for the passwords to be assigned to linux users:
- vagrant
- hacluster
- fenceclus
cp provision/vars/cluster_password.TMPL.yml provision/vars/cluster_password.ymlThe file must be edited and the passwords changed.
Vagrant is configured (see Vagrantfile file) to create Ubuntu 20.04 vms but you may edit it and change the box to Centos 7 or AlmaLinux.
To create the vms and configure the Linux cluster through ansible use the command:
vagrant up --provisionAdd a cluster node
To add acluster node you need to edit Vagrantfile file and change $NUM_CLUSTER_NODES variable, for example going from default 3 to 4 nodes, save and then use the command:
vagrant up --provisionRemove a cluster node
To remove a cluster node use the commands:
vagrant destroy cl-node-3
then edit Vagrantfile file to decrease by 1 the value of $NUM_CLUSTER_NODES variable and therefore:
vagrant up --provision
Cluster: Provision with ansible
Of course it is possible to use ansible without using vagrant if the vm’s have already been created since vagrant at the first provision creates the inventory file for ansible in:
.vagrant/provisioners/ansible/inventory/vagrant_ansible_inventory
In addition the playbook file is:
provision/playbook.yml
The complete ansible command for provision is:
ansible-playbook --inventory-file=.vagrant/provisioners/ansible/inventory/vagrant_ansible_inventory provision/playbook.ymlIn this way you can also use ansible on a single tag or to get information on all the vm.
For example, to provision only the cluster part (and not all the first part of the vms installation), the “controller” tag can be used, while the “fence” tag can be used for the part referring to the fence resources:
ansible-playbook --inventory-file=.vagrant/provisioners/ansible/inventory/vagrant_ansible_inventory --tags="fence" provision/playbook.yml
# or
ansible-playbook --inventory-file=.vagrant/provisioners/ansible/inventory/vagrant_ansible_inventory --tags="controller" provision/playbook.yml
Passwords safe
If you want to protect the Linux users password provision/vars/cluster_password.yml file, you can create an encrypted ansible vault using the command:
ansible-vault encrypt provision/vars/cluster_password.yml
You will be prompted for the encryption password and then the file will be encrypted.
At this point, in order to work with vagrant, you need to uncomment the Vagrantfile file on the line:
#ansible.ask_vault_pass = true
It can be done by editing the file or with the simple command:
sed -i 's/#ansible.ask_vault_pass/ansible.ask_vault_pas/' Vagrantfile
From now on, whenever vagrant provisions, ansible will prompt you to enter the password of the newly created vault.
Conclusions
This third article concludes all the tests on a virtual environment to manage a Linux cluster of N nodes though Pacemaker, Corosync and pcs.
We started with the manual installation, then through vagrant for managing the vms and then with we used the bash shell as a provisioner.
Finally in this article we have automated again using ansible as a provisioner simplifying and making the project reusable in a simpler way.
For any other clarification or specification, I refer you to linux-cluster-test-ansible.
References
- Previous article;
- Ansible;
- Installation Guide for Ansible;
- Ansible Vault;
- Vagrant to install, configure and manage virtual machine;
- Virtualbox to virtualize vm;
- Pacemaker is an open source, hight availability resource manager suitble for both small and large cluster;
- The Corosync Cluster Engine is a Group Communication System with additional features for implementing high availability within applications;
- Fence Agent fence_ssh to test the cluster agent fence;
- Pcs is a Corosync and Pacemaker configuration tool;
- linux-cluster-test on Github;
- linux-cluster-test-ansible su Github;
- Ubuntu 20.04 and 18.04 LTS;
- Centos 7;
- AlmaLinux;
- RedHat;