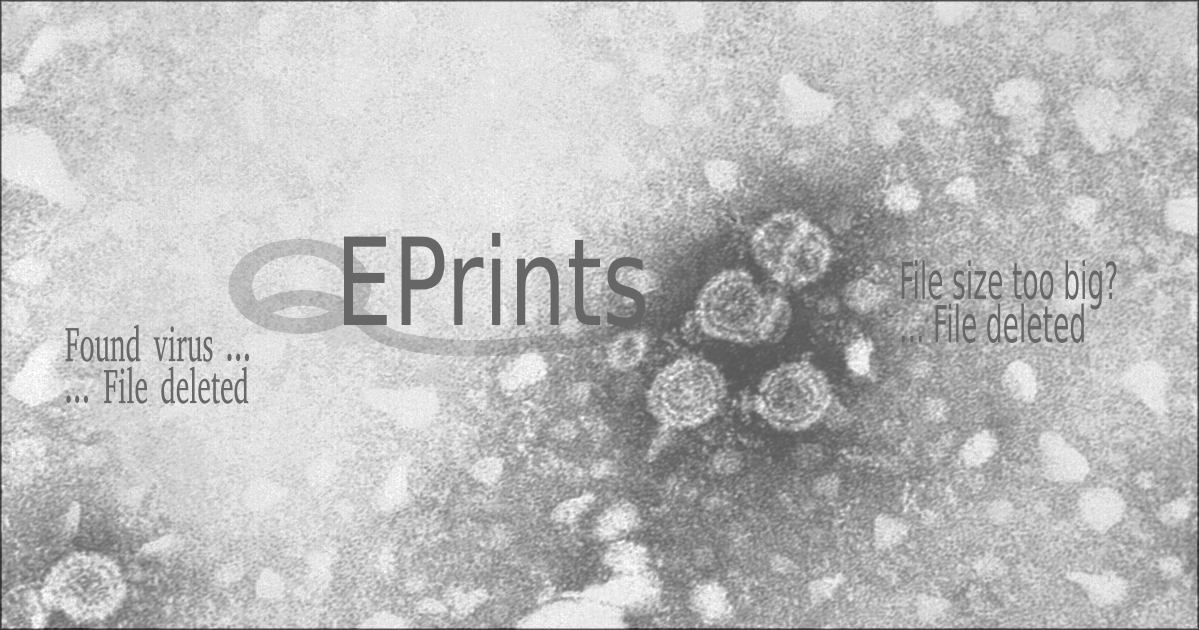
In this article, I’m talking about EPrints and how to configure it best to limit the size of files that can be uploaded to the server web and can control content through an antivirus.
Introduction
In order to continue, consider that the software is already installed to version 3.3.15 , the latest available for production and that:
- $EPRINTS points to the software base
- $ARCHIVEID is the name of the archive we will handle in this article.
Then the folder will have to exist $EPRINTS/archives/$ARCHIVEID/
Data validation in EPrints
In EPrints the configuration of validation controls can be done at both single-field, document and full eprint level depositing during the specific workflow of the software.
In particular, you must work on the configuration files in $EPRINTS/archives/$ARCHIVEID/cfg/cfg.d</ em> to apply one or more controls.
For descriptive simplicity, we can define the $EPCONF = $EPRINTS/archives/$ARCHIVEID/cfg </ em> variable and describe the 3 validations present:
- of the single field
which is made by editing the $c->{validate_field} = sub { … } function in the $EPCONF/conf.d/field_validate.pl file and is invoked for each field of the eprint when navigating in the forward or backward workflow; - of the document
which is made by editing the $c->{validate_document} = sub { … } function in the $EPCONF/conf.d/document_validate.pl file and is invoked for each document of the eprint when navigating in the forward or backward workflow; - of the eprint
which is made by editing the $c->{validate_eprint} = sub [ … } function in the $EPCONF/conf.d/eprint_validate.pl file and is invoked for each eprint when you click then button “Deposit item now“
Of course, if any of these three validations has a problem, you can not continue if the problem is not resolved.
What we want to get
Since we’re concerned about limiting the size of the file uploaded and no viruses , the function to use is undoubtedly $c->{validate_document} so that the problem is immediately detected at the first click on the forward or backward button during the workflow.
To do this we need to install the antivirus that for this article we assume it is ClamAV.
Antivirus installation
To install ClamAV just use the classical installation of the distribution on the server:
– ubuntu or Debian: sudo apt install clamav-daemon
– redhat/centos: yum install -y epel-release; yum install -y clamav
– fedora: yum install -y clamav clamav-update
– gentoo: emerge clamav
For more information go to the official website at https://www.clamav.net/documents/installing-clamav
Implementation
To manage this new configuration we create a new file upload.pl in $EPCONF/conf.d/ where we put the “upload_limit variable that will contain the maximum byte limit for us acceptable:
$c->{'upload'}={
upload_limit=>10*1024*1024,
};
In this case we set a limit of 10Mib.
For real control, we create a “upload_file” function that will do everything you need and will be called by validate_document
$c->{'upload_file'}=sub {
  my ($session,$fileobj,$nohtml)=@_;
  my (@problems);
  ...
  @problems=();
  # controllo dimensione file e se necessario creo un messaggio con il problema rilevato
  ...
  # controllo antivirus sul file e se necessario creo un messaggio con il problema rilevato
  ...
  # if there are detected problems, delete the file for security
  # and if the file is unique in the document also delete the document
  # if the document is not to be deleted check that the deleted file
  # is not the main one set in the "main" field and in the case of a
  # response it eliminates the value of "main"
  ...
  return @problems;
}
At this point just add that control to the $EPCONF/conf.d/document_validate.pl configuration file at the end of the validate_document function, and then before:
return( @problems );Add the following code:
# start antivirus check: must be the last check
if ($repository->can_call('upload_file')) {
  my $files=$document->get_value( "files" );
  my @problems2=();
  foreach my $file (@{$files}) {
    my @problems2=$repository->call('upload_file', $repository,$file);
    push @problems,@problems2;
  }
}
# end antivirus check
Just restart the web server apache to test the operation.
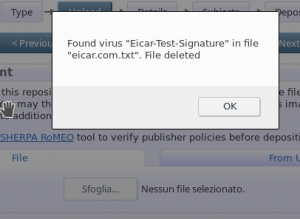
To try a file with a test virus you can download that of the ClamAV ie the eicar.com.txt.

Remarks
Of course, with this configuration, we are unable to publish a document that is too large and contains a virus, but we are unable to block it during loading or during the selection, and for that I refer you to the next article entitled “EPrints Tips & tricks: upload limit and anti-virus check – part 2 of 2 .
Online Code
To download all the complete code you can go to my “eprints_validate_upload_file” project on github
Safety Observations
To avoid filling the disk and to avoid attacks of the denial-of-service it is always useful to define the maximum message size in POST (and therefore also attachments) that the server will accept.
Of course the size of the POST generally does not match the dimension of the attachment and therefore for security I would put that dimension at least 20% more than the maximum of the attachment.
To avoid a very large POST, one of the following methods can be used:
- method at Eprints : just set the $CGI::POST_MAX = 1024 * 1024 * 20; variable (20MB posts) in a configuration file (such as upload.pl)
- metodo at apache level: just set the “LimitRequestBody 20971520” (20MB posts). As default Apache 2.4 use “LimitRequestBody 0” which corresponds to a maximum of 2GB.